May
17
May
9
Final practice

April
25
Artist meet
April
25
Meet the artist
April
11
blog post 10 artists plan and artist develop art making skills
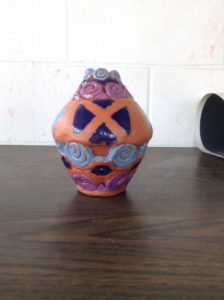
The thing I wanted to know about my subject matter was I wanted to figure out the perfect combination of glazes for my plate. The way I ended up planning for this was by getting out test tiles and putting the different shades of blue, green, and pinks. Before the colors came out I had some ideas of what colors I should use but then when the tiles cam out my mind changed. I came up with a new pattern consisting of not only just using one flower color (like I had planned previously) but 4 different ones. Also the blues I wanted to use also were changed. The green was the only one that sticked to the plan because when glazing the tile I knew this was the perfect shade for the stems of my flower. I learned from my preliminary process that i should always plan out what colors I want to use and test them, because if I don’t, the colors I choose might come out not complementing each other. Also I didn’t only plan my colors. One idea I explored was the way I should glaze my flowers. I had two options: glazing them free-handed or using a outline. The outline ended up coming out much better due the leaves of the flower not looking as connected and more separated as opposed to the free-handed one which was just a mess.

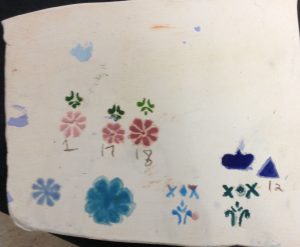
The skills I have developed from this plate project was my painting techniques. I came in this class not being as artistically inclined. Throughout the years I’ve tested myself by drawing a scalloped design or little fishes, but painting things was a whole new level for me. Over the spring break I had to practice my painting techniques and the way I should hold the paintbrush. When I came back I then started practicing on this big tile with glazes to see how the things would come out as I painted them. Applying these techniques to my piece has been the most challenging part of this project because my hand are just shaky and I always do these little mistakes and when I try to fix them it ends up becoming a bigger mistake. But practice makes perfect. Trying to draw these curves, making the lines perfect, making the repeating patterns the same (which has been really hard), and of course trying to paint on top of the outline without going outside the lines has really been a struggle but it became better the more I practiced. This project has unlocked a new artistic side of me that I thought I never had. And overall I am really enjoying this project.
March
28
Blog post 9: Artists Communicate through their work, and Global Awareness of art making
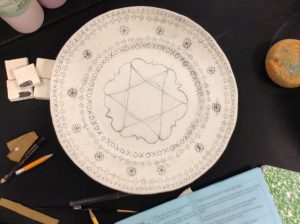
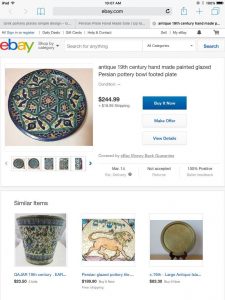
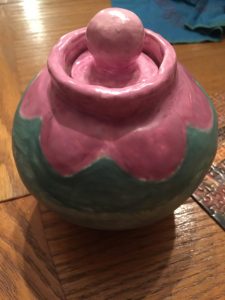
This is the first project that I have specifically done that is personal, and targets my culture. It is an iznik Persian/Turkish plate.This artwork is about who I am because even though I am ethnically Lebanese, throughout homes, and in many businesses they have at least one of these plates. So it somewhat has to do with my culture. I got this idea from when I was at home and I saw an iznik plate, and I though I want to do that. But then I thought I shouldn’t just copy the design but make my own. This artwork is intended to say, ” Hey this is me, and you known its mine because it is personally made.” This isn’t something that if I didn’t put my name on it could have been made by anyone. This is achieved by taking my cultural background, but also in the middle of the plate I will be writing my name in Arabic. This is another personalized feature meant to communicate with others that this is me. Also I am exploring an trying to convey is the culture of this plate. I went through many sources online from Persian to Turkish plates, and the Persian plates had more flowers on them, and the Turkish one had more repeating geometric figures. This research and implementing it on my piece is that its conveying the culture. The meaning is me, and where I come from. So overall this piece is going to be a mix between Persian, and Turkish cultures with my own personal spin on it.
 My plate
For the Artists have global awareness of art making, i found inspiration of this culture at home. Like I previously said, I was just walking around my house and i found this plate, and i decided to make something like it. The way I used ideas or tools from previous areas in my artwork was the slab building. This plate was made by a mold entirely out of slabs, so that is how I got the form. I researched Iznik plates and I found that there are two different types, Turkish and Persian. This lead me to make connections between the plates. The Turkish one had more geometric patterns. The Persian plates however had more floral patterns. They were both similar is that they had repetitive patterns and in most cases they had a pattern in the middle and another pattern surrounding it. Also in most of the plates they used some type of blue as the main color.
 vs
vs 
Persian Turkish
February
21
What I am good at, and what I need development in?
Throughout the year I have found two of the things I am good at are developing art making skills and artists plan. In artists developing art making skills, I thrive in this area because since the beginning of day one in pottery I have been working with hand building. After I developed methods like coiling I wanted to make bigger and better coiled forms. For example, I created a small coiled vase, then later on I made this giant big vase. That took a lot of development in my hand-building skills because I had to get the thickness of the coils just right which took a lot of practice, and also how I developed the notion of where to place my coils to create the forms I wanted. Not only that but on top of my hand-building skills I added slab based forms, lids, and handles onto my hand based forms. I expanded my range of building just coiled vase forms, to forms with lids and handles. Although this is also a place I need development in. Disregarding the hand building part of pottery there is another part………THE WHEEL. To be honest the wheel is something that need a lot of time to develop. I need to practice more and develop my skills in this aspect of it. I thought I could just jump on the wheel and then create this water pitcher. Well I was so wrong. I think I need to slowly develop my forms for example start with a small bowl, then a big bowl, to a small vase, to a big vase, then learn how to shape the vase into different form. So I am good at the hand building aspect, but on the wheel I am just not as fully developed.

white earthenware-glaze, dimensions 5-2-2

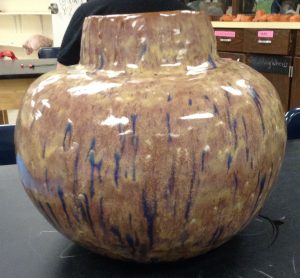
. terra cotta (red earthenware) was used. I used glaze for these.turritella is the glaze. 8-3-4


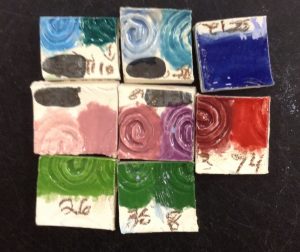
Then I find myself doing well in planing my artwork. For every piece I plan out every single detail. To the way I want to design it, to the colors, and to the way it will be shaped. Of course there are some revisions in this process. Then after that I cut a cardboard cut-out to help guide me in my work. I also make a mini Maquette to help show my how my form would turn out. But also when I am planning out my project I look online for examples. This helps get my creative juices and help me plan how to make it my own. I didn’t just plan things myself but i actively go out and research common structures for my object and then i develop it to fit my own ideas. Also something new that i gained this year is planning out my glaze colors by testing how they look on test tiles
![]()


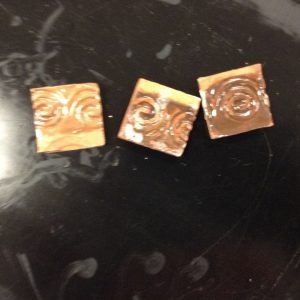
test tiles
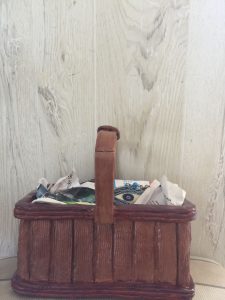
I need work in artists communicate through their work. over the past year I have created artwork but most of them don’t really scream me. The artworks that I created that really showed me was the globe and also that big turtella earthenware clay. Those represent me because the globe shows my interest for languages, and the turtella earthenware clay reminds me of old pieces that I am interested in. Right now, I am currently trying to make a project that is personalized . I am thinking of creating a water pitcher that is relevant to my heritage. Also I am planning to make an iznik with my name personalized in the center. Those two artworks that I am the progress of developing will communicate me. The baskets I completed were me but not really. I mean I created this original place, but i got this inspiration from other sources via sylvia hyman. I liked her idea of making a basket. But that doesn’t really say hey this is me and this is why. Sure I enjoyed making things that have a facade of looking real but it was not personalized.


February
7
Blog post #7: Artists Reflect and Use materials and tools in an appropriate and safe way
 |
|
| Artists reflect and Use materials and tools in an appropriate and safe way | |
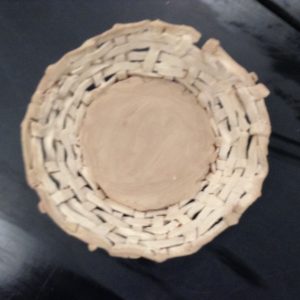
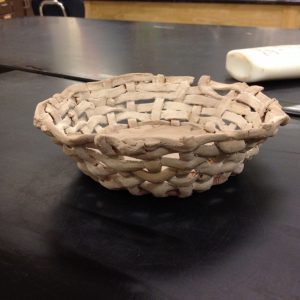
| When my basket came out of the kiln, i took a step back and started analyzing my project. I was startled by how shockingly similar the basket resembled a wooden one. I initially thought tha… | |
|
January
24
Blog Post 6: Artists Develop art making skills and artists take risks
Last week I was reintroduced to the infamous pinch pot. We were assigned to make a pair of pinch pots and try to form it into a shape of our choosing. At first I decided to make a basic pinch pot, but then I realized that I could make geometric forms from this basic pinch pot. So I reshaped it, and ended up on making a square and triangle shaped pinch pot. This was a new technique formed with an old technique. I used my old knowledge of making a pinch pot and then using my new knowledge, I reshaped it. It was hard at first due to to it cracking and it not wanting to stay in shape. So then I let it get shaped into the way I wanted and then the next day when it was harder, I shaped it again. I increased my skill in shaping by using tools that I had previously used. For example I used the metal scraper to get more finer edges and then I used the metal smoother to smooth it down. This gave me more of a flat geometric surface. Also an old technique I applied to this newly shaped geometric pot was adding a lid. In pottery one I had made a lid, and so this year I applied my lid-making skills to this geometric shaped pinch pot. So overall I used old techniques like my knowledge of making basic pinch pots and lids, and the use of old tools int order to apply it to a new technique, which was reshaping a pinch pot into a geometric shape.
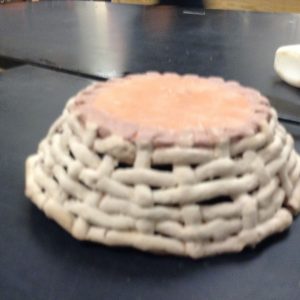
After my basket was fired I reached a new dilemma, how to color it. At first I thought that I would paint my smaller bowl with colors, but then I realized I could use test tiles to experiment on. I used 3 test tiles to see which color would be beneficial to me. I layered some colors and for others I combined. My first test tile was layering fudge brown, then caramel and then I repeated that again. For the second one I mixed the same colors I previously mentioned before. For my final test tile I layered straw then antique then straw. When they came out of the kiln, they all turned out beautiful. I was worried about some of the colors. I ended up using the last one on my small bowl before applying it to my basket. I was worried about how the basket would turn out because what if I had used the wrong ratios, or applied to thin or thick of a stroke of glaze. I still do not know whether or not the small basket turned out good because it is still firing. So now I am hoping that the colors worked out. The thing I learned from testing things out and creating test tiles is that it is great to always think before you act. If I had just went and painted my basket without even considering other options who could have know how it would have turned out. But because I stopped and thought about other options I became more confident in my choices.This also shows how taking risks by experimenting instead of just painting the unknown on your final IRREVERSIBLE piece is much better of an idea than just jumping into action.
test tiles
painted bowl
painted bowl
painted bowl
December
6
Blog post 5: Artists reflect and Artist Research
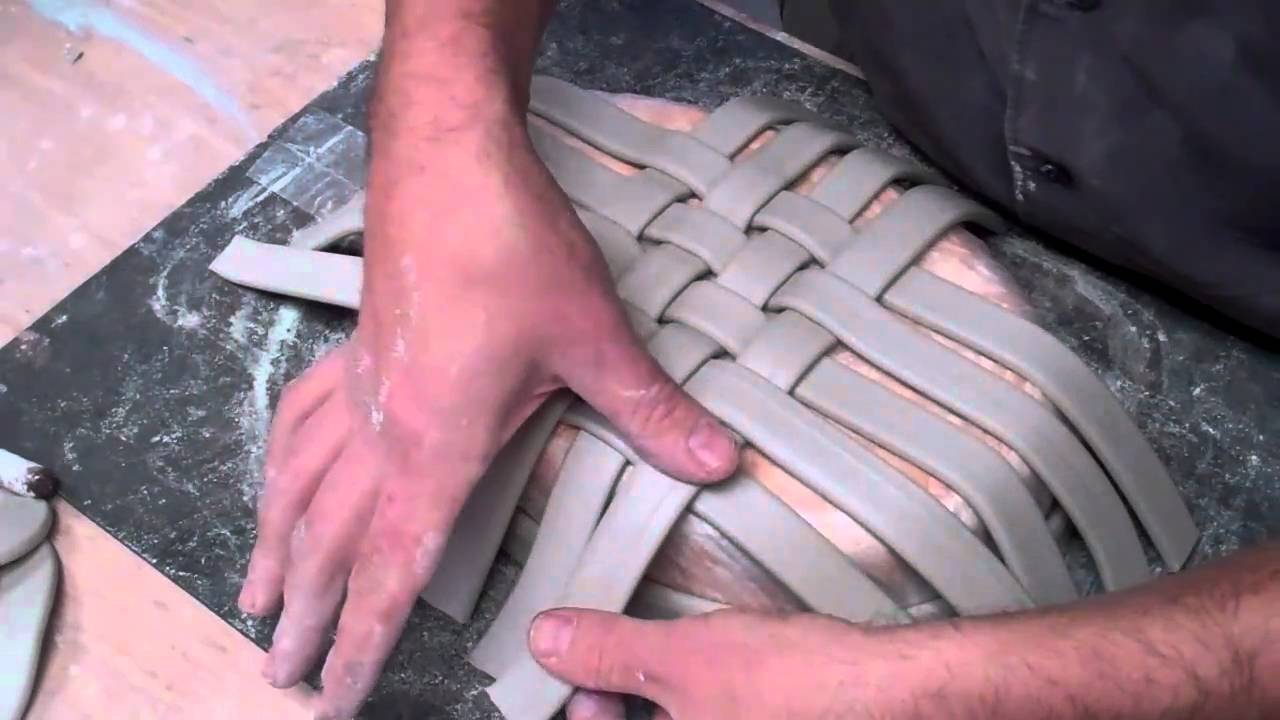
When building my Circular baskets I had to find out how to weave it. So like every question we have in this society, I googled it. I ended up finding pictures online of clay-woven circular baskets, and how they had these separate slabs that they layered on each other. I then set out to find a video to walk me through how to exactly weave it. The video said you needed a bowl so you could have something to support you work. The one would take about 1/2 inch slabs and lay them vertically next to each other. Then take the same sized slabs and lay them horizontally but you have to lay them under and over the vertical slabs. This video was really helpful in learning how to weave a basket. From learning the methodology of basket weaving i applied to this to my bowls, and they turned out similar. The photos that i googled really helped in showing how the bowl should look, and how they were detailed. This of course led me to research the wooden baskets design. I viewed many baskets, looking at their wooden textures; i even brought a wooden basket to class. Examining this photos with their wooden details this led me into a quest for finding the perfect object that makes the texture i like. I eventually found the object i needed: a toothbrush and wooden broom. Using the bristles of both the broom and the brush, i used them on the clay. This gave the clay a more wooden texture that I had found while researching these wooden baskets.

![]()

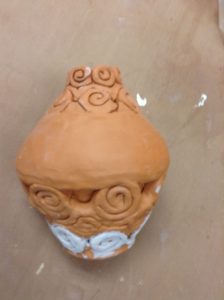
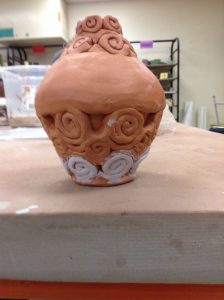
After my exposed coiled vase came out I liked the way it came it. There was not cracks, and the exposed coils were firmly in tact. I kinda expected that the coils were going to come out firmly attached because when i was building this I saw that they were not sturdy. So i took a step back and analyzed on how i could improve its stability. I ended up deciding that I should smooth it on the inside so there was no design and add more coils to the inside to support. Also on the outside between the individual coiled-swirls I added little triangular pieces between them to keep them sturdy. I am glad that i took a step back during my work to see how to give this vase more support, or it would have cracked. If I were to create this project again, I would make the design cover the whole vase instead of created a band in the middle where it was plain. I think if i had done that the pot would flow better.